Creating a PostScript file on a PC from an
Application such as Microsoft Word or WordPerfect
The following is a step-by-step procedure for creating a PostScript file on a PC. Particular details may differ depending on the version of Windows used and the application software employed.
- From Windows, open the installed Printers Folder and select ("click") a PostScript printer driver (install one if necessary)
- From the File menu select Properties and a Dialog box should appear similar to:
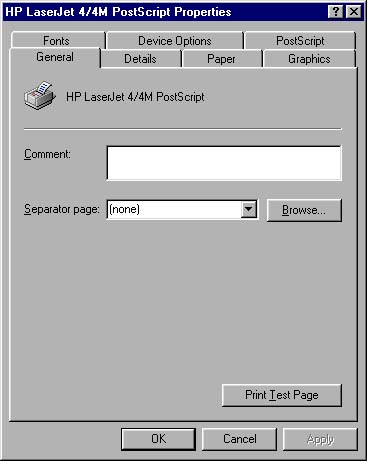
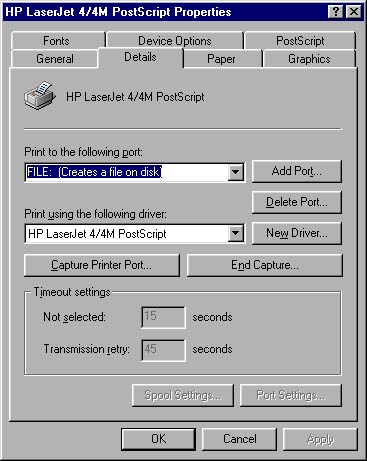
- Select Details and set Print to the following port: FILE (Creates a file on disk). Make sure Print using the following driver: is set to your preferred PostScript driver. The Dialog box should now resemble:
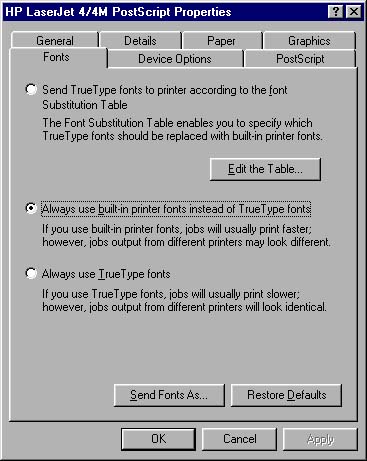
- Select Fonts and set the option to Always use built in printer fonts... (make sure that you have prepared your document using only the standard PostScript Fonts which are built-in to most PostScript printers) so that the dialog box resembles:
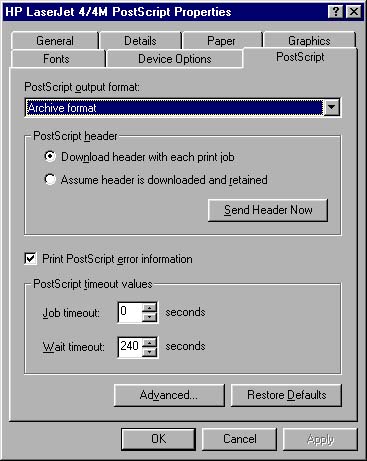
- Select PostScript and set PostScript output format: Archive format and also set PostScript header to the option Download header with each print job. The Dialog box should now resemble:
- While the PostScript properties are still displayed select the Advanced... button near the bottom of the Dialog box and another Dialog box should appear. In this new Dialog box, for PostScript language level select the highest level available for your printer. Make sure that Data format selection is set to ASCII data. When finished the Dialog box should resemble:
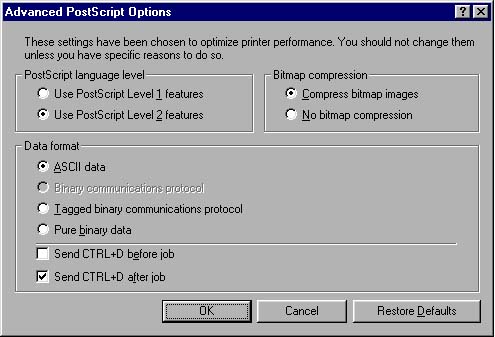
- Click the OK button at the bottom of Dialog box above to return to:

- Click the OK button at the bottom of the Dialog box above.
- You are now finished setting up Windows to print a PostScript file and are ready to create a PostScript file of your paper from within your application (word processor, desk-top publisher, etc.)
- With your application running open your paper in the active window.
- From the File menu of your application select Print and you will see a dialog box similar to:
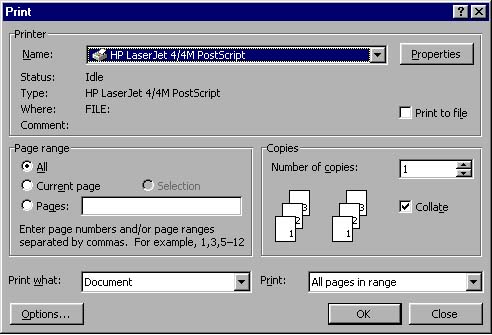
- Select the Name of the printer to be the printer you just customized to print a PostScript file to disk
- Make sure the small checkbox labelled Print to file on the right side of the Dialog box is checked. When properly set the Dialog box should resemble:
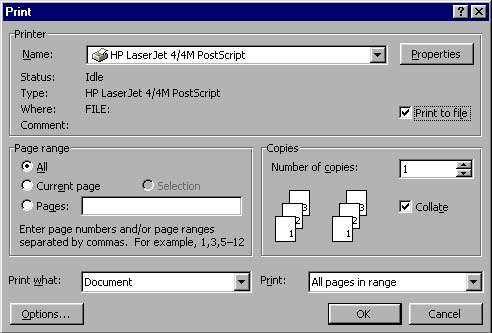
- Then select the Properties button in the upper right of the Dialog box and make sure that the PostScript Properties are consistent with the settings you made earlier from Windows. Specifically, make sure that the PostScript output format is set to Archive format so that the Dialog box resembles:
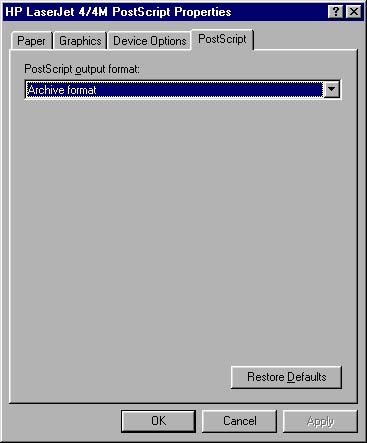
- Click the OK button at the bottom of the Dialog box above.
- You should now be back at the previous Dialog box.
- Click the Options button in the lower left hand corner and make sure the options are consistent with:
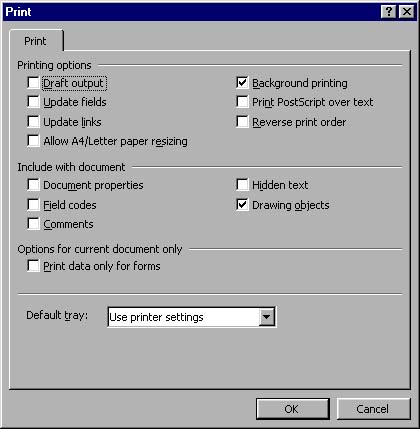
- Click the OK button at the bottom of the Dialog box above to return to the main Print Dialog box:

- Click the OK button at the bottom of the main Print Dialog box.
- A Dialog Box prompting you for a file name and a directory in which to save the file should appear which looks similar to:
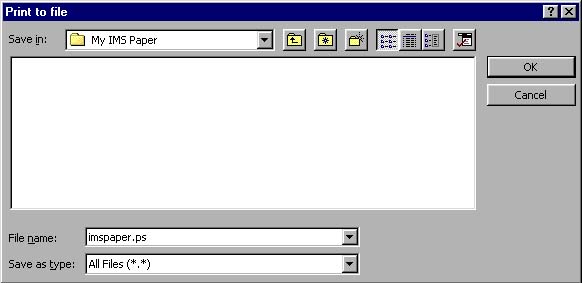
- Select or create a directory in which you wish to save your file.
- Select Save as type: All Files (*.*)
- Type the name of your PostScript file into the text window labeled File name making sure that you use a .ps file name extension.
- This is the file you will upload over the IMS Paper Submission Web site


